Difference between revisions of "Scheduling an appointment using Outlook"
Your guide to pathway services
(Created page with "Users and schedule appointments using Outlook. To schedule an appointment: #Open Outlook. #Click '''Calendar'''. File:Outlook click calendar1.png|none|Outlook click...") |
|||
| (3 intermediate revisions by one user not shown) | |||
| Line 1: | Line 1: | ||
| − | Users | + | Users can schedule appointments using Outlook. |
| Line 34: | Line 34: | ||
<ol start="5"> | <ol start="5"> | ||
| − | <li></li> | + | <li>In the '''To...''' field, enter the email address of an attendee, use a semi-colon to enter more than one email address.</li> |
| + | <li>In the '''Subject '''field, enter the appointment subject.</li> | ||
| + | <li>In the '''Location '''field, enter the appointment location.</li> | ||
| + | <li>Use the dropdown lists to select the appointment '''Start time''', and '''End time'''.</li> | ||
| + | <li>Enter text in the message body.</li> | ||
</ol> | </ol> | ||
| + | |||
| + | |||
| + | |||
| + | [[File:Outlook new appointment3.png|none|Outlook new appointment3.png]] | ||
| + | |||
| + | |||
| + | <ol start="10"> | ||
| + | <li>Click '''Scheduling Assistant'''.</li> | ||
| + | </ol> | ||
| + | |||
| + | |||
| + | |||
| + | [[File:Outlook new appointment4.png|none|Outlook new appointment4.png]] | ||
| + | |||
| + | |||
| + | <ol start="11"> | ||
| + | <li>Navigate through the scheduling calendar to see if there are any conflicts. If any conflicts arise you can modify the start time and end time of the appointment.</li> | ||
| + | </ol> | ||
| + | |||
| + | |||
| + | |||
| + | [[File:Outlook new appointment5.png|none|Outlook new appointment5.png]] | ||
| + | |||
| + | |||
| + | <ol start="12"> | ||
| + | <li>Click '''Appointment'''.</li> | ||
| + | <li>Review the appointment details.</li> | ||
| + | <li>Click '''Send'''.</li> | ||
| + | </ol> | ||
| + | |||
| + | <br/>[[File:Outlook new appointment6.png|none|Outlook new appointment6.png]] | ||
Latest revision as of 12:51, 1 June 2017
Users can schedule appointments using Outlook.
To schedule an appointment:
- Open Outlook.
- Click Calendar.
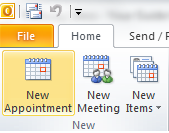
- Click New Appointment.
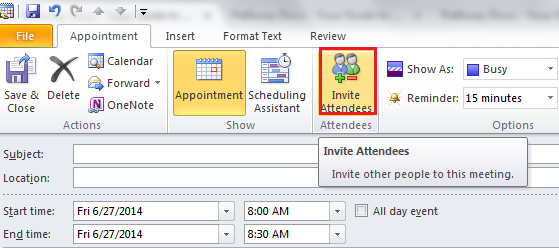
- Click Invite Attendees.
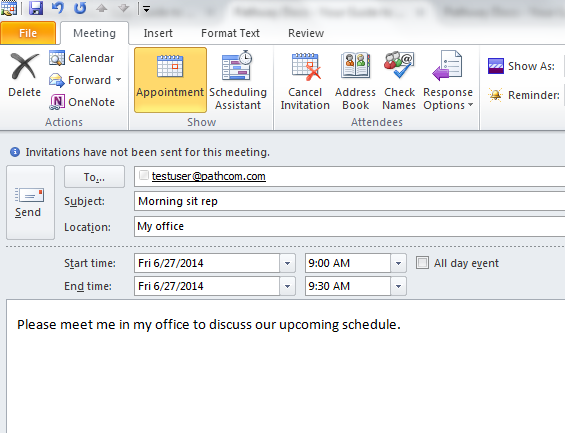
- In the To... field, enter the email address of an attendee, use a semi-colon to enter more than one email address.
- In the Subject field, enter the appointment subject.
- In the Location field, enter the appointment location.
- Use the dropdown lists to select the appointment Start time, and End time.
- Enter text in the message body.
- Click Scheduling Assistant.
- Navigate through the scheduling calendar to see if there are any conflicts. If any conflicts arise you can modify the start time and end time of the appointment.
- Click Appointment.
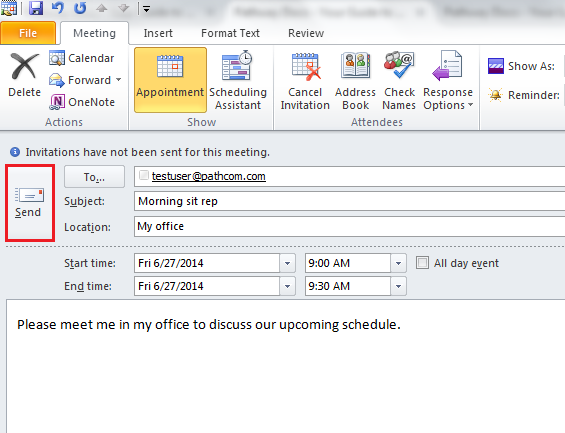
- Review the appointment details.
- Click Send.


