Difference between revisions of "Creating a note in EasyMail"
Your guide to pathway services
| (4 intermediate revisions by one user not shown) | |||
| Line 13: | Line 13: | ||
<ol start="3"> | <ol start="3"> | ||
<li>Click '''New Note'''.</li> | <li>Click '''New Note'''.</li> | ||
| + | </ol> | ||
| + | |||
| + | |||
| + | |||
| + | [[File:Webmail new note2.png|none|Webmail new note2.png]] | ||
| + | |||
| + | |||
| + | <ol start="4"> | ||
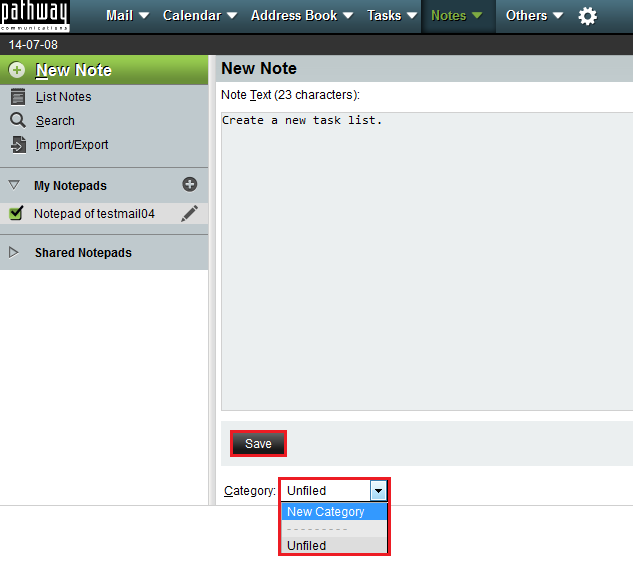
| + | <li>In the '''Note Text '''field, enter the text for your note.</li> | ||
| + | <li>From the '''Category '''dropdown list, select an existing category or select '''New Category '''to create a new one.</li> | ||
| + | </ol> | ||
| + | |||
| + | |||
| + | |||
| + | <span style="color:#0000cd">If you selected '''New Category''', continue at step 6.</span> | ||
| + | |||
| + | <span style="color:#0000cd">If you selected an existing category, proceed to the next step, and then skip steps </span><span style="color:#0000cd">7-8.</span> | ||
| + | |||
| + | |||
| + | |||
| + | [[File:Webmail new note3.png|none|Webmail new note3.png]] | ||
| + | |||
| + | |||
| + | <ol start="6"> | ||
| + | <li>Click '''Save'''.</li> | ||
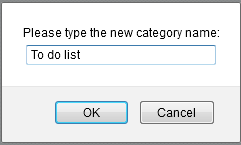
| + | <li>When prompted, enter a new category name.</li> | ||
| + | </ol> | ||
| + | |||
| + | |||
| + | |||
| + | [[File:Webmail new note4.png|none|Webmail new note4.png]] | ||
| + | |||
| + | |||
| + | <ol start="8"> | ||
| + | <li>Click '''OK'''.</li> | ||
</ol> | </ol> | ||
Latest revision as of 10:28, 8 July 2014
To create a note in EasyMail:
- Log in to EasyMail.
- Click the Notes tab.
- Click New Note.
- In the Note Text field, enter the text for your note.
- From the Category dropdown list, select an existing category or select New Category to create a new one.
If you selected New Category, continue at step 6.
If you selected an existing category, proceed to the next step, and then skip steps 7-8.
- Click Save.
- When prompted, enter a new category name.
- Click OK.


