Difference between revisions of "Editing distribution list members"
Your guide to pathway services
| (2 intermediate revisions by one user not shown) | |||
| Line 14: | Line 14: | ||
#Select an organization from the list. | #Select an organization from the list. | ||
| − | #Click '''Distribution | + | #Click '''Distribution Lists'''. |
| Line 22: | Line 22: | ||
<ol start="3"> | <ol start="3"> | ||
| + | <li>Select a distribution list.</li> | ||
<li>Click '''Edit Members'''.</li> | <li>Click '''Edit Members'''.</li> | ||
<li>If you would like to add all of the listed members to the distribution list, select the '''Yes '''checkbox.</li> | <li>If you would like to add all of the listed members to the distribution list, select the '''Yes '''checkbox.</li> | ||
| Line 28: | Line 29: | ||
</ol> | </ol> | ||
| − | <br/>[[File:Edit members distribution list exchange.png|none]] | + | <br/>[[File:Edit members distribution list exchange.png|none|Edit members distribution list exchange.png]] |
Latest revision as of 10:23, 9 May 2014
After creating a distribution list, administrators can add and remove members to and from the list.
To edit the members of a distribution list:
From the Exchange Enabled Organizations page:
(Click here for instructions on how to get to this page)
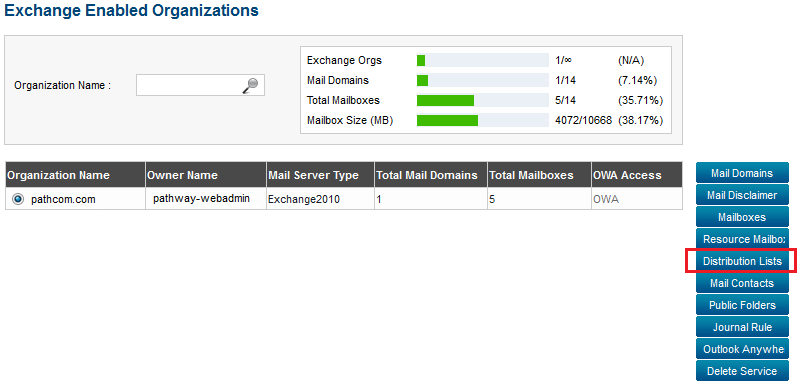
- Select an organization from the list.
- Click Distribution Lists.
- Select a distribution list.
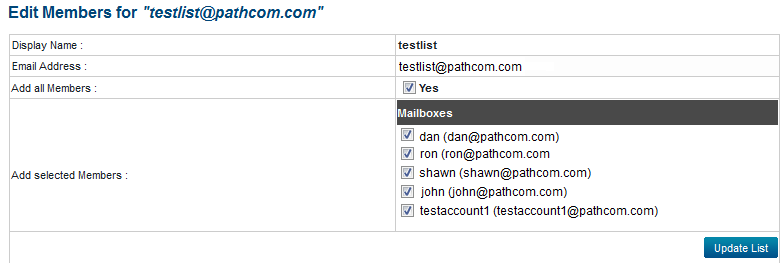
- Click Edit Members.
- If you would like to add all of the listed members to the distribution list, select the Yes checkbox.
- To manually select distribution list members, select the checkbox beside the appropriate mailboxes.
- Click Update List.


