Difference between revisions of "Configuring Microsoft Outlook"
Your guide to pathway services
| (One intermediate revision by one user not shown) | |||
| Line 3: | Line 3: | ||
| − | #Click on the '''Windows Start''' button, select '''Control Panel''', and then double-click the '''Mail '''icon. ( | + | #Click on the '''Windows Start''' button, select '''Control Panel''', and then double-click the '''Mail '''icon. (For some versions of Windows you may have to go to, '''Control Panel > User Accounts > Mail'''.) |
#Click '''Show Profiles...''' | #Click '''Show Profiles...''' | ||
| Line 81: | Line 81: | ||
| − | [[File:Outlook mail setup9.png|none]] | + | [[File:Outlook mail setup9.png|none|Outlook mail setup9.png]] |
Latest revision as of 09:08, 11 May 2016
To configure Microsoft Outlook:
- Click on the Windows Start button, select Control Panel, and then double-click the Mail icon. (For some versions of Windows you may have to go to, Control Panel > User Accounts > Mail.)
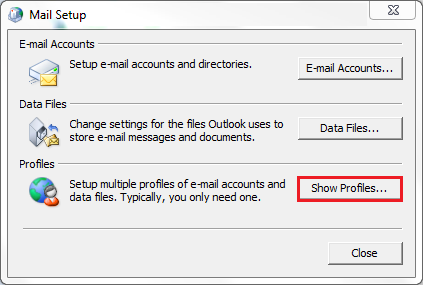
- Click Show Profiles...
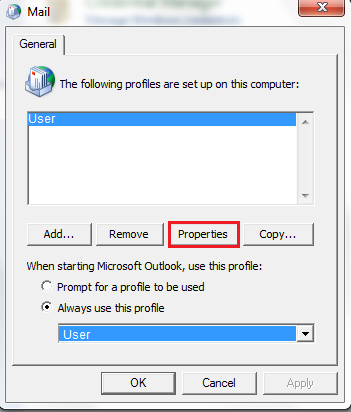
- Highlight the profile you would like to use and click Properties.
- Click E-mail Accounts…
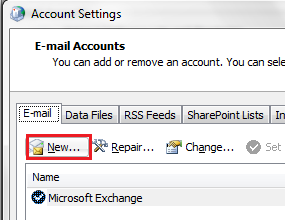
- Click New…
- Select Email Account, and then click Next.
- Select Manually configure server settings or additional server types, and then click Next.
- Select Microsoft Exchange server or compatible service, and then click Next.
- In the Server field, enter your server name.
- In the User Name field, enter your email address and click Check Name.
- When prompted, enter your password, and then click OK
- Click More Settings…
- Click the Connection tab.
- Select the Connect to Microsoft Exchange using HTTP, and then click Exchange Proxy Settings.
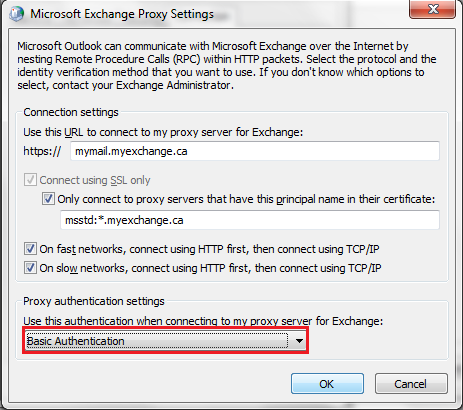
- Select all of the checkboxes and enter the information shown in the screenshot.
- Select Basic Authentication from the dropdown list.
- Click OK.


