Difference between revisions of "Adding an Email Alias"
Your guide to pathway services
| Line 14: | Line 14: | ||
[[File:Add new email alias.png|none|Add new email alias.png]] | [[File:Add new email alias.png|none|Add new email alias.png]] | ||
| + | |||
| + | |||
| + | |||
| + | When you arrive at the '''Email Alias '''page: | ||
| + | |||
| + | | ||
| + | |||
| + | 1. In the '''Email '''field; | ||
| + | |||
| + | a) create an email alias in the '''Alias '''field. (E.g. ''johndoe''''')''' | ||
| + | |||
| + | b) from the '''Domain''' dropdown list, select an email address to forward emails to. (E.g. ''qwert.us'') | ||
| + | |||
| + | 2. From the '''Destination '''dropdown list, select the email address. (Users with this domain will also receive emails sent to email addresses under the domain alias. | ||
| + | |||
| + | 3. Select the '''Active '''checkbox to activate the email alias. To deactivate the email alias unselect the checkbox. | ||
| + | |||
| + | 4. Click '''Save.''' | ||
Revision as of 13:22, 4 February 2014
An email alias is a forwarding email address, it automatically allows an email that is sent to an alias to be forwarded to the specified email address.
To add an email alias:
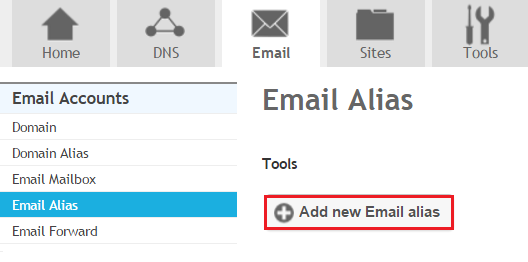
- Go to the Email tab.
- Locate Email Accounts, click Email Alias.
- Click Add new Email alias.
When you arrive at the Email Alias page:
1. In the Email field;
a) create an email alias in the Alias field. (E.g. johndoe)
b) from the Domain dropdown list, select an email address to forward emails to. (E.g. qwert.us)
2. From the Destination dropdown list, select the email address. (Users with this domain will also receive emails sent to email addresses under the domain alias.
3. Select the Active checkbox to activate the email alias. To deactivate the email alias unselect the checkbox.
4. Click Save.


