Difference between revisions of "Setting up Email Forward"
Your guide to pathway services
| Line 21: | Line 21: | ||
| | ||
| − | + | <ol start="5"> | |
| − | + | <li>In the '''Email '''field;</li> | |
| + | </ol> | ||
a) create an email alias in the '''Alias '''field. (E.g. ''johndoe''''')''' | a) create an email alias in the '''Alias '''field. (E.g. ''johndoe''''')''' | ||
b) from the '''Domain''' dropdown list, select the domain that will be forwarding emails. (E.g. ''example.com'') | b) from the '''Domain''' dropdown list, select the domain that will be forwarding emails. (E.g. ''example.com'') | ||
| − | + | <ol start="6"> | |
| − | + | <li>In the '''Destination''' field, enter the email addresses to forward emails to.</li> | |
| − | + | <li>Select the '''Active '''checkbox to activate the email forward. To deactivate the email forward unselect the checkbox.</li> | |
| − | + | <li>Click '''Save.'''</li> | |
| − | + | </ol> | |
| − | + | ||
[[File:Email forward screen.png|none|Email forward screen.png]] | [[File:Email forward screen.png|none|Email forward screen.png]] | ||
Revision as of 01:03, 13 February 2014
Email Forward allows email going to one address to be sent to several other email addresses.
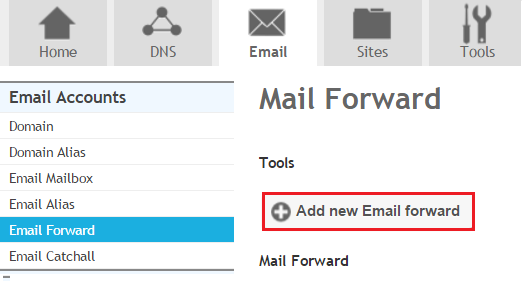
To add an email forward:
- Go to the Email tab.
- Locate Email Accounts.
- Click Email Forward.
- Click Add new Email Forward.
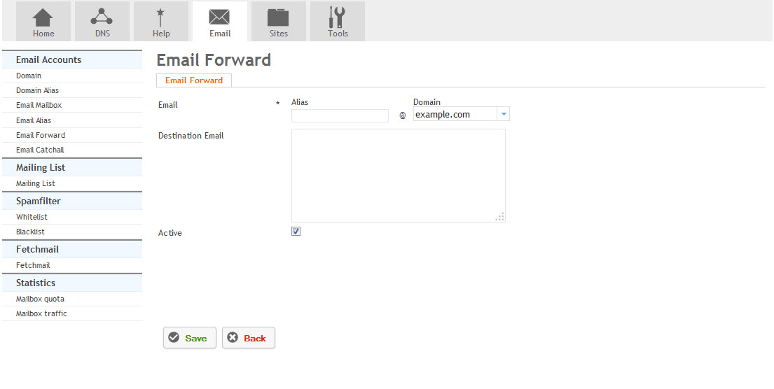
When you arrive at the Email Forward page:
- In the Email field;
a) create an email alias in the Alias field. (E.g. johndoe)
b) from the Domain dropdown list, select the domain that will be forwarding emails. (E.g. example.com)
- In the Destination field, enter the email addresses to forward emails to.
- Select the Active checkbox to activate the email forward. To deactivate the email forward unselect the checkbox.
- Click Save.


