Difference between revisions of "Configuring Whitelists in EasyMail"
Your guide to pathway services
| Line 32: | Line 32: | ||
== '''Editing your Whitelist'''<br/> == | == '''Editing your Whitelist'''<br/> == | ||
| + | |||
| + | |||
<span style="color:#0000ff">Perform steps 1-3 from the '''Viewing your Whitelist '''section before performing the steps below.</span> | <span style="color:#0000ff">Perform steps 1-3 from the '''Viewing your Whitelist '''section before performing the steps below.</span> | ||
Revision as of 13:49, 27 January 2015
EasyMail allows users to add and delete Whitelist entries.
Contents |
Viewing your Whitelist
To view your Whitelist:
- Log in to EasyMail.
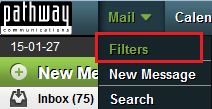
- From the Mail dropdown tab, click Filters.
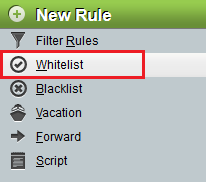
- From the Rule pane, select Whitelist.
Your Whitelist will be displayed.
Editing your Whitelist
Perform steps 1-3 from the Viewing your Whitelist section before performing the steps below.
Adding entries to your Whitelist
- In the Whitelist addresses field, type the email addresses that you would like to add to the whitelist. (Enter each email address on a separate line).
- Click Save.
Notifications will appear after you save your whitelist.
Removing entries from your Whitelist
- In the Whitelist addresses field, delete the email addresses that you would like to remove from the whitelist.
- Click Save.
Notifications will appear after you save your Whitelist.


