Difference between revisions of "Adding a public folder"
Your guide to pathway services
| Line 30: | Line 30: | ||
</ol> | </ol> | ||
| + | <span style="color:#0000cd">(Please note that public folder size limits might be preset based on your MyExchange plan).</span> | ||
| − | |||
| − | |||
| − | |||
<ol start="9"> | <ol start="9"> | ||
<li>Click '''Add Public Folder'''.</li> | <li>Click '''Add Public Folder'''.</li> | ||
Revision as of 10:24, 12 May 2014
Public folders are folders that allow users to share files with other people using other computers on the same network.
To add a public folder:
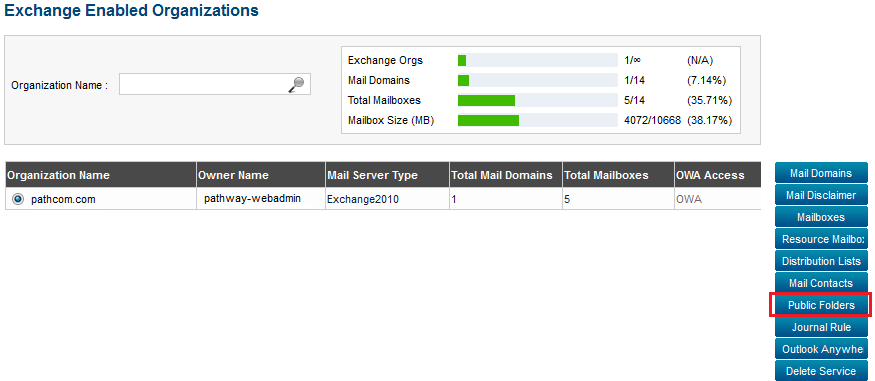
From the Exchange Enabled Organizations page:
(Click here for instructions on how to get to this page)
- Select an organization from the list.
- Click Public Folders.
- Click Add Public Folder.
- In the Public Folder Name field, create a name for the folder.
- From the Public Folder Type dropdown list, select a folder type.
- If you would like to enable mail settings for the public folder, select the checkbox.
- In the Email Address field, enter an email address to associate the public folder with.
- In the Public Folder Size field, enter the folder size in MB.
(Please note that public folder size limits might be preset based on your MyExchange plan).
- Click Add Public Folder.


