Difference between revisions of "Setting up MyExchange on your iPhone"
Your guide to pathway services
m (Protected "Setting up MyExchange on your iPhone" ([Edit=Allow only administrators] (indefinite) [Move=Allow only administrators] (indefinite)) [cascading]) |
|||
| Line 28: | Line 28: | ||
| − | <ol start=" | + | <ol start="8"> |
<li>Select what information you would like to sync, and then click '''Save'''.</li> | <li>Select what information you would like to sync, and then click '''Save'''.</li> | ||
</ol> | </ol> | ||
| Line 35: | Line 35: | ||
| − | <ol start=" | + | <ol start="9"> |
<li>Create a passcode if prompted, click '''Continue''' and enter a passcode.</li> | <li>Create a passcode if prompted, click '''Continue''' and enter a passcode.</li> | ||
</ol> | </ol> | ||
Revision as of 08:46, 16 June 2014
Pathway MyExchange customers have the ability to install MyExchange on their iPhone.
To setup MyExchange on your iPhone:
- Go to Settings.
- Click Mail, Contacts, Calendars.
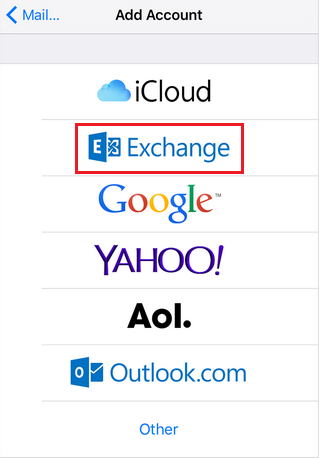
- Click Add Account.
- Click the Microsoft Exchange icon.
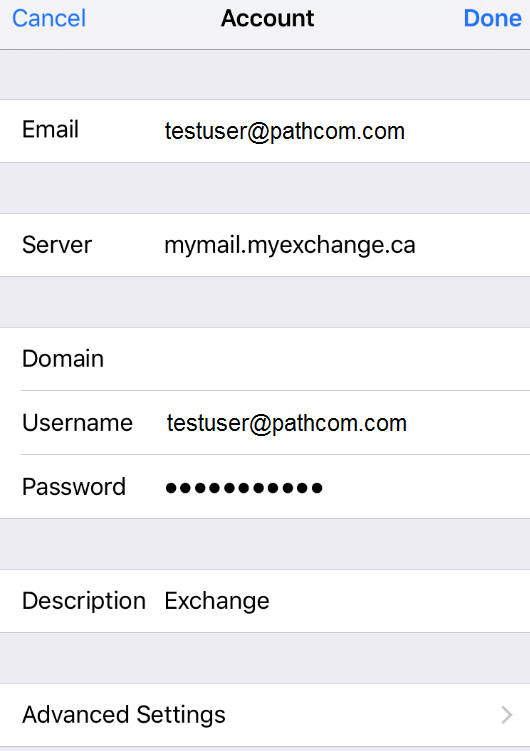
- Fill in the Email, Username, and Password fields.
- Your iPhone will now verify your account information and the Server field should appear. If you get an Unable to Verify Certificate pop-up, click Accept.
- In the Server field, enter your server name, and then click Next. (Leave the Domain field blank).
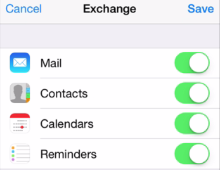
- Select what information you would like to sync, and then click Save.
- Create a passcode if prompted, click Continue and enter a passcode.


