Difference between revisions of "Managing your antispam profiles"
Your guide to pathway services
| Line 1: | Line 1: | ||
| − | The '''Profile''' tab allows administrators to manage and configure antispam profiles for a specific policy | + | The '''Profile''' tab allows administrators to manage and configure antispam profiles for a specific policy. |
Revision as of 12:49, 28 October 2014
The Profile tab allows administrators to manage and configure antispam profiles for a specific policy.
Manage or configure an antispam profile
To manage or configure your antispam profile:
- Log in to FortiMail.
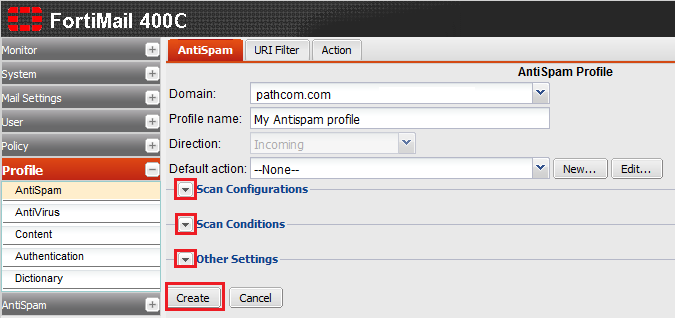
- Expand the Profile pane.
- Click AntiSpam.
- Double-click an existing profile to modify it, or click New to add a profile.
- From the Domain dropdown list, select your domain.
- In the Profile name field, enter a profile name.
- From the Default action dropdown list, select an action.
- Expand the Scan Configurations pane and make modifications where necessary.
- Expand the Scan Conditions pane and make modifications where necessary.
- Expand the Other Settings pane and select the checkbox if you would like to automatically update user whitelists.
- Click OK to confirm your changes. If you are adding a new profile, click Create instead.
Clone an antispam profile
From the AntiSpam profile page:
- Click the AntiSpam tab.
- Select one of the listed profiles.
- Click Clone...
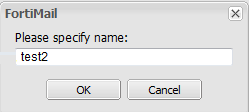
- When prompted, enter a name for the cloned profile, and then click OK.
Delete an antispam profile
From the AntiSpam profile page:
- Click the AntiSpam tab.
- Select one of the listed profiles.
- Click Delete...
- When prompted, click Yes.


