Difference between revisions of "Configuring FortiMail User Groups"
Your guide to pathway services
| Line 13: | Line 13: | ||
<li>Click '''New...''', or double-click one of the listed user groups to modify the group preferences.</li> | <li>Click '''New...''', or double-click one of the listed user groups to modify the group preferences.</li> | ||
<li>In the '''Group Name''' field, enter a name for the user group.</li> | <li>In the '''Group Name''' field, enter a name for the user group.</li> | ||
| − | <li>To add a user to the group, enter | + | <li>To add a user to the group, enter the username of the new group member in the '''User''' field, then click the right arrow to add the user to the list of members.</li> |
<li>To remove a user from the group, select a user from the list of members, then click the right arrow.</li> | <li>To remove a user from the group, select a user from the list of members, then click the right arrow.</li> | ||
</ol> | </ol> | ||
Revision as of 10:13, 27 May 2014
Administrators are able to group related email user accounts by using the User Group tab.
To view and configure user groups:
- Log in to FortiMail.
- Expand the User pane.
- Click User.
- Click the User Group tab.
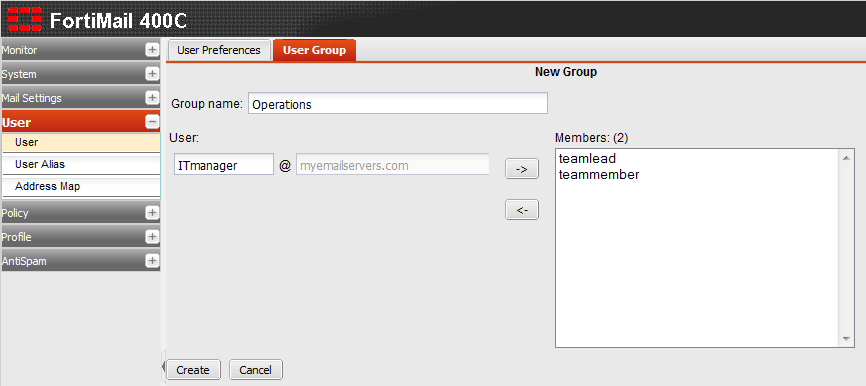
- Click New..., or double-click one of the listed user groups to modify the group preferences.
- In the Group Name field, enter a name for the user group.
- To add a user to the group, enter the username of the new group member in the User field, then click the right arrow to add the user to the list of members.
- To remove a user from the group, select a user from the list of members, then click the right arrow.
- If this is a new user, click Create. If this is an existing user, click OK to update the group's preferences.


