Understanding MX Records
Your guide to pathway services
A mail exchange (MX) record is a type of DNS record that specifies how emails are routed to a specific mail server. (it directs your domain’s emails to the servers hosting your user’s email accounts.) HostPath will manage these settings to make sure emails are always delivered to the correct mail server.
Contents |
How MX Records Work
The MX record ensures that emails from a domain are delivered to the correct mail server.
Directing Emails
An MX record will show that all emails@example.com should be routed to the mail server at example.com. An email sent to user@example.com is directly routed to the email server 216.43.49.148.
To further ensure that emails always get delivered, you will need to create MX records for multiple servers. When one server is down, emails will be routed to another server instead. You can assign priorities to each server using increments of 10, 20, 30, and so on. The lowest value receives the highest priority and will be tried first.
Setting the Priority
If the domain example.com has two MX records, mail1.example.com might have a priority of 10 and mail2.example.com might have a priority of 20, emails are delivered first to mail1.example.com because it has a lower priority number. If mail1.example.com is down, emails are redirected to mail2.example.com. If two servers have the same priority, one server is chosen randomly.
How to Setup an MX Record with HostPath
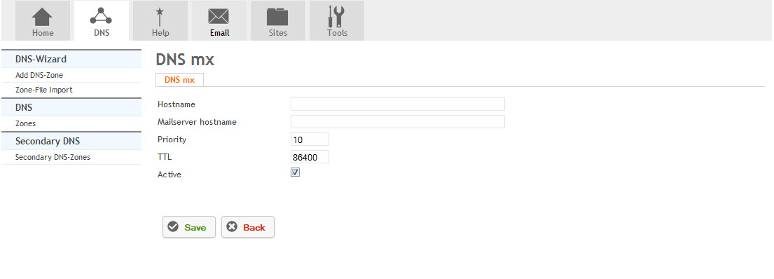
To create an MX record:
- In the DNS module, select a zone.
- Click Records.
- Click MX.
- Fill in the fields as follows:
| Field |
Description |
|---|---|
| Hostname |
Enter the hostname of the device. |
| Mailserver hostname |
Enter the mailserver hostname. (All emails @hostname will be routed to this mailserver hostname). |
| Priority |
Set the priority number for the mailserver. A lower number is higher priority. |
| TTL |
Adjust the TTL value of the zone in seconds. |
| Active |
Select to activate the MX record. |
- Click Save.


