Using the DNS-Wizard to set up DNS
Your guide to pathway services
Revision as of 21:34, 12 February 2014 by Pathway Admin (Talk | contribs)
In this example, we assume that you own a domain and you purchased this domain through your registrar.
- Log in to Hostpath.
- Go to the DNS tab.
- Locate DNS-Wizard.
- Click Add DNS-Zone.
When you arrive at the DNS Zone Wizard
- From the Template dropdown list, choose a webhosting template.
- In the Domain field, enter your domain name.
- In the IP address field, select an IP addresss. (You can choose from our list of suggested IP addresses.)
- In the NS 1 field, specify your first nameserver.
- In the NS 2 field, specify your second nameserver.
NOTE: In general, nameservers begin with ns# before the domain name. (E.g. ns1.yourdomain.com, ns2.yourdomain.com)
- In the Email field, enter the email address of your administrator.
- Click on Create DNS-record.
When you arrive at the DNS-Zones page:
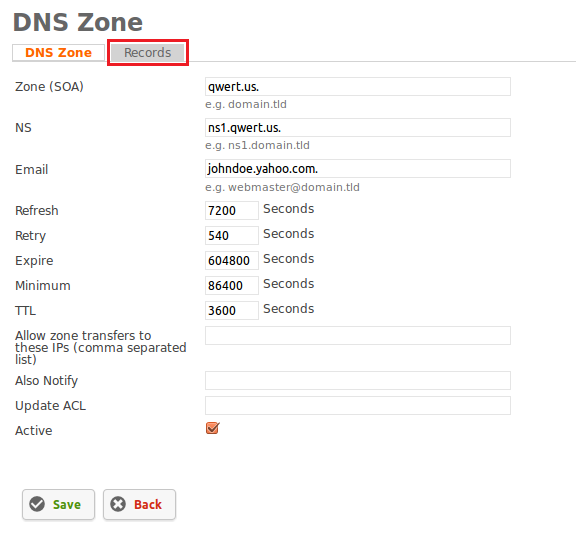
- Click on the DNS-Zone entry that you just created.
- Click on the Records tab.
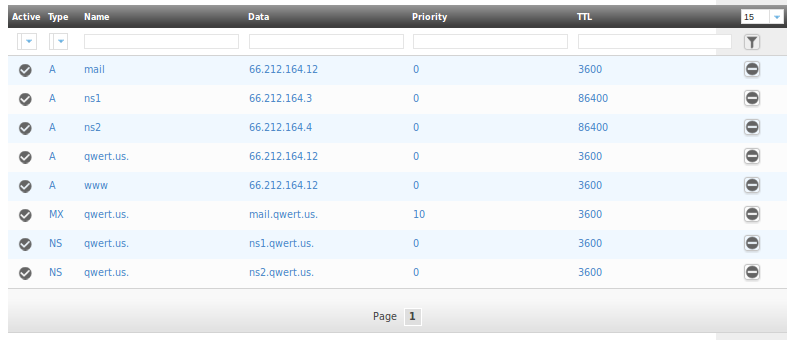
- Locate and select the IP address for ns1 that you just created.
- Review and make note of the information on the next screen. (You will use these IP addresses to create glue records.)
- Click Save.
- Locate and select the IP address for ns2 that you just created.
- Review and make note of the information on the next screen. (You will use these IP addresses to create glue records.)
- Click Save.


