Editing a tasklist in EasyMail
Your guide to pathway services
Revision as of 16:08, 10 June 2015 by Pathway Admin (Talk | contribs)
To edit an EasyMail task list:
- Log in to EasyMail.
- Click the Tasks tab.
From the Tasks section:
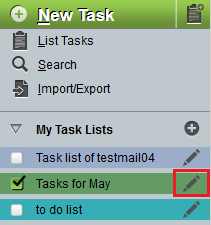
- Expand the My Task Lists pane.
- Click the Edit icon (pencil) beside the task list that you would like to edit.
- (Optional) In the Name field, enter a new name for the task list.
- (Optional) In the Color field, enter a new color hex code, or select a color using the color picker.
- (Optional) In the Description field, enter a new description for the task list.
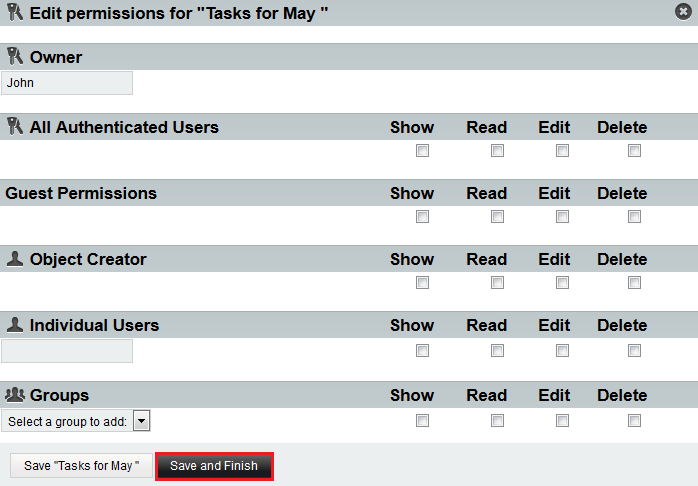
- (Optional) To change address book permissions, click Change Permissions.
- (Optional) In the Owner field, enter the EasyMail username of the new owner of this task list. Task lists can be assigned to other users.
- (Optional) Set the permissions for the address book by filling in the applicable fields.
- Click Save and Finish.
- Click Save.
Your task list details are now updated.


