Setting up EasyMail on your Android
Your guide to pathway services
Revision as of 09:56, 8 January 2016 by Pathway Admin (Talk | contribs)
Pathway MyExchange customers have the ability to install MyExchange on their Android phone.
NOTE: Steps may vary depending on the make, model, and version of your Android device. If the steps below do not work for your device refer to your manufacturer's support resources for your particular device.
To setup MyExchange on your Android:
- Go to Settings > General > Accounts & Sync.
- Click Add account.
- Click E-mail.
- Click Other.
- Fill in the Email Address and Password fields.
- Click Next
- Click IMAP4 or POP.
If you selected IMAP4, complete the steps in IMAP setup section.
If you selected POP, skip to the POP setup section and complete the steps.
IMAP setup
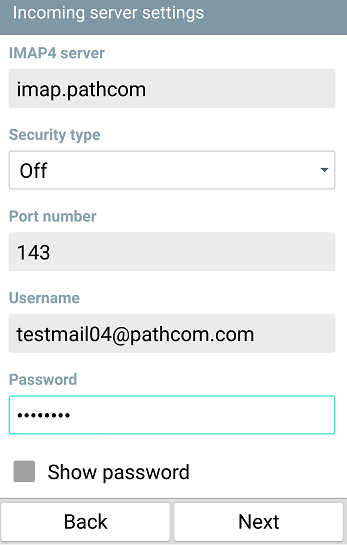
- In the IMAP4 server field, enter imap.pathcom.com
- In the Port number field, enter 143.
- In the Username field, enter your username.
- In the Password field, enter your email password.
- Click Next.
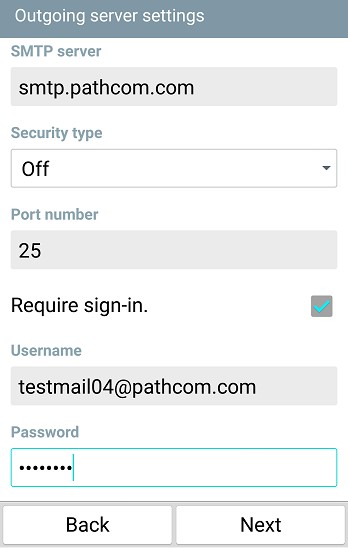
- In the SMTP server field, enter smtp.pathcom.com
- In the Port number field, enter 25.
- In the Username field, enter your username.
- In the Password field, enter your email password.
- Click Next.
Setup is complete.
POP setup
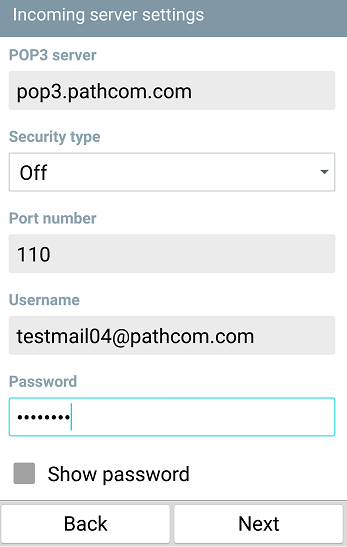
- In the POP3 server field, enter pop3.pathcom.com
- In the Port number field, enter 110.
- In the Username field, enter your username.
- In the Password field, enter your email password.
- Click Next.
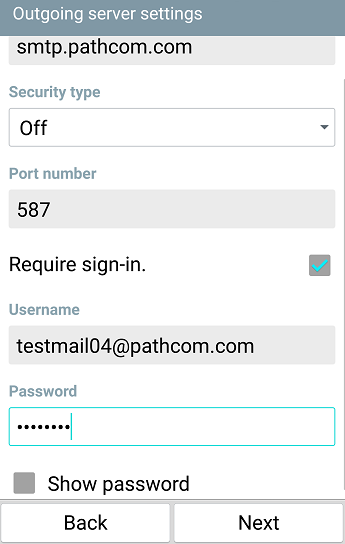
- In the SMTP server field, enter smtp.pathcom.com
- In the Port number field, enter 587.
- In the Username field, enter your username.
- In the Password field, enter your email password.
- Click Next.
Setup is complete.


