Create a custom virtual network in Hyper V
Your guide to pathway services
Revision as of 14:46, 29 June 2016 by Pathway Admin (Talk | contribs)
If you would like to create your own custom virtual network, with your own configuration, follow the steps below:
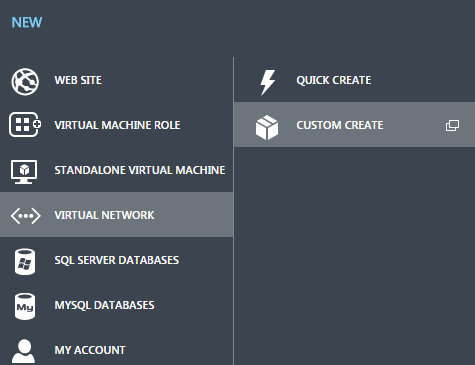
- Click NETWORKS.
- Click +NEW.
- Select VIRTUAL NETWORK.
- Click CUSTOM CREATE.
- Enter a name for the network.
- Select IPV4 or IPV6 (based on your requirements).
- Click the arrow to proceed.
- (Optional) Add the IP addresses of your DNS servers.
NOTE: This is optional. DNS servers can be added to your virtual network for name resolution. Click the help icon beside DNS SERVERS for more details.
- (Optional) Select the Enable direct internet access using NAT checkbox if you would like to connect using the hosting provider’s gateway.
- (Optional) Select the Configure site-to-site VPN checkbox if you would like to define the site-to-site connectivity settings.
- IMPORTANT: If you selected one or both of the checkboxes in steps 8 and 9, follow the steps below. If you do not want to enable these options, skip this step and continue to step 12.
- Use the gateway subnet provided in the GATEWAY SUBNET field.
- (Optional) Select the Enable BGP for automatic address space checkbox if you would like to automatically route traffic to other networks over a site-to-site VPN connection.
- Click the arrow to continue.
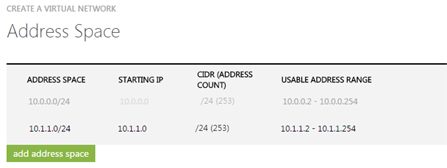
- Setup the IP range by entering an IP address in the STARTING IP field.
- Select an address count from the CIDR (ADDRESS COUNT) dropdown list.
- Click add address space and repeat steps 11 and 12 to add an additional address space.
- Click the checkmark.
The network will be created.


