Configuring a POP or IMAP HostPath email account from your desktop
Your guide to pathway services
You can setup a POP or IMAP email account directly from your desktop if you are a HostPath customer.
- Click the Windows Start button.
- Select Control Panel.
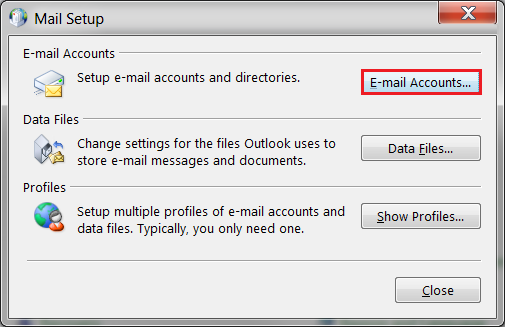
- Click the Mail icon.
(For some versions of Windows you may have to go to Control Panel > User Accounts > Mail.)
- Click Email Accounts.
- Click New...
- Select Manually configure server settings or additional server types.
- Click Next.
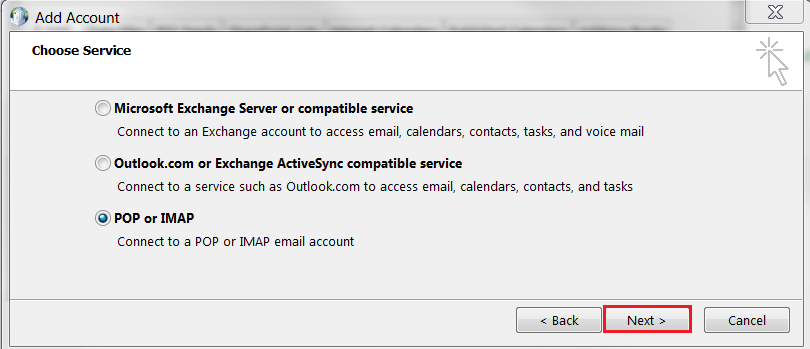
- Select POP or IMAP.
- Click Next.
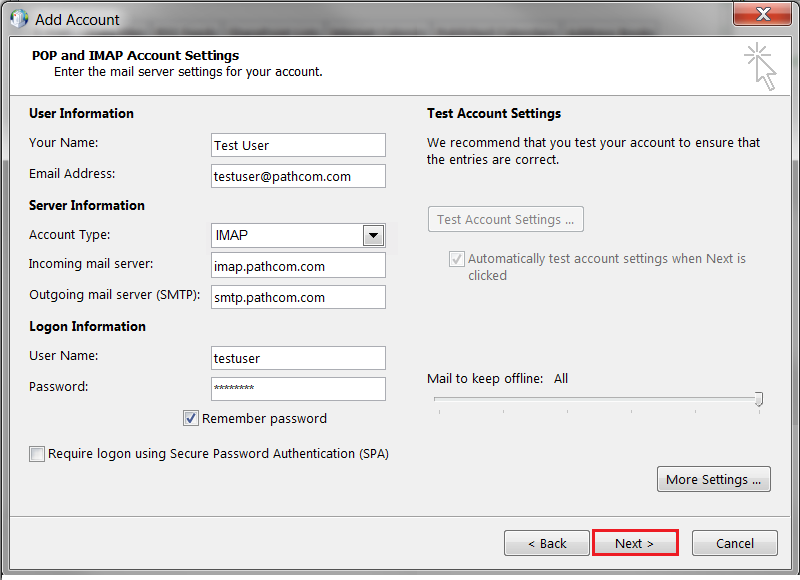
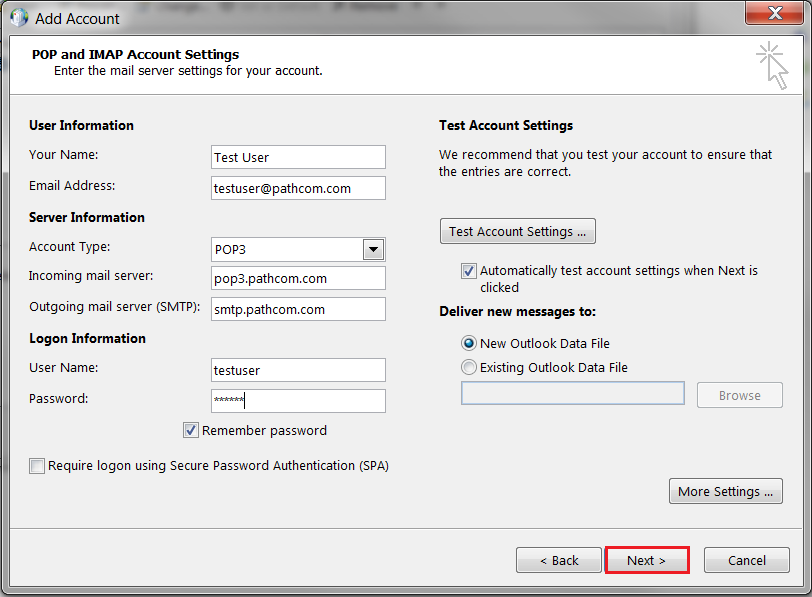
- Enter the user's name in the Your Name field.
- Enter the user's email address in the Email Address field.
IMAP
(Scroll past the next screenshot to view POP steps.)
- From the Account Type dropdown list, select IMAP.
- In the Incoming mail server field, enter imap.yourdomainname.com
- In the Outgoing mail server (SMTP) field, enter smtp.yourdomainname.com
- In the User Name field, enter a user name for the user.
- In the Password field, enter a password.
- Click Next.
Review the tabs to make sure your settings are applied and then click OK or Done (depending on your version of Windows) to finish.
POP
- From the Account Type dropdown list, select POP3.
- In the Incoming mail server field, enter imap.yourdomainname.com
- In the Outgoing mail server (SMTP) field, enter smtp.yourdomainname.com
- In the User Name field, enter a user name for the user.
- In the Password field, enter a password.
- Click Next.
Review the tabs to make sure your settings are applied and then click OK or Done (depending on your version of Windows) to finish.


