Creating a Task List in EasyMail
Your guide to pathway services
To create a task list in EasyMail:
- Log in to EasyMail.
- Click the Tasks tab.
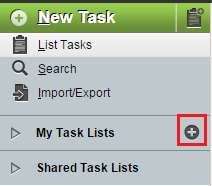
- Locate the My Task Lists pane and click the + icon.
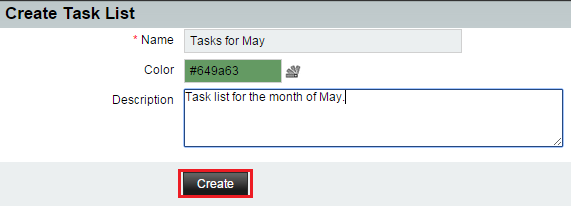
- In the Name field, enter a name for the task list.
- In the Color field, enter a color hex code, or select a color using the color picker.
- In the Description field, enter a description for the task list.
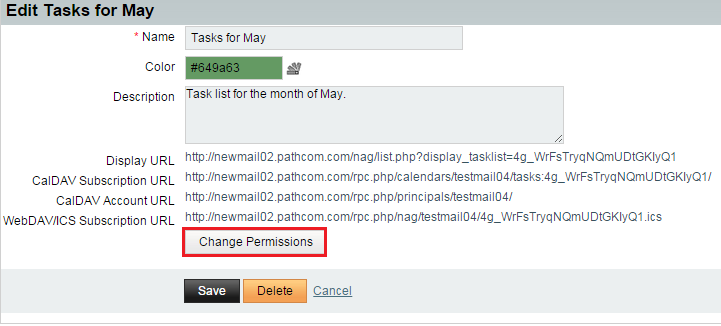
URLs will be generated for your tasklist.
- Click Change Permissions.
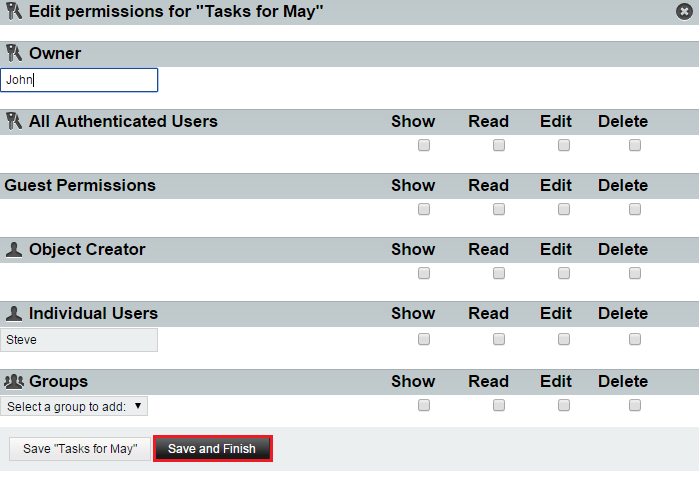
- In the Owner field, enter the EasyMail username of the owner of this task list. Task list can be assigned to other users.
- Set the permissions for the task list by filling in the applicable fields.
- Click Save and Finish.
- Click Save.
Your task list is now created.


