Setting up an MX Record with Hostpath
Your guide to pathway services
To create an MX record:
- Click on the DNS tab.
- Locate DNS.
- Select Zones.
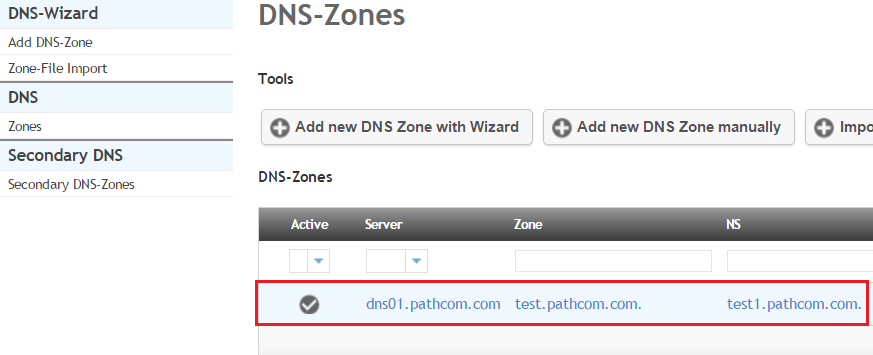
- From the DNS-Zone page, select an active DNS zone from the list.
- Click on the Records tab.
- Click MX.
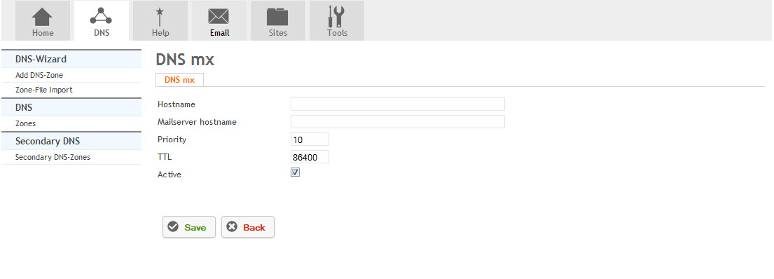
When you arrive at the DNS mx page:
- In the Hostname field, enter the hostname of the device.
- In the Mailserver hostname field, enter the mailserver hostname. (All emails @hostname will be routed to this mailserver hostname.)
- In the Priority field, set the priority number for the mailserver. (A lower number means higher priority.)
- In the TTL field, adjust the TTL value of the zone. (In seconds.)
- Select the Active checkbox to activate the MX record. To deactivate the MX record unselect the checkbox.
- Click Save.


