Setting up automatic replies using the Outlook Web App
Your guide to pathway services
Users can schedule automated messages to respond to contacts when they are unavailable.
To setup an automatic reply:
- Log in to OWA.
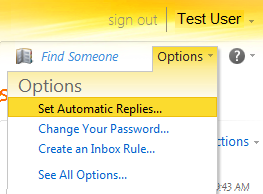
- Click the Options dropdown arrow.
- Click Set Automatic Replies...
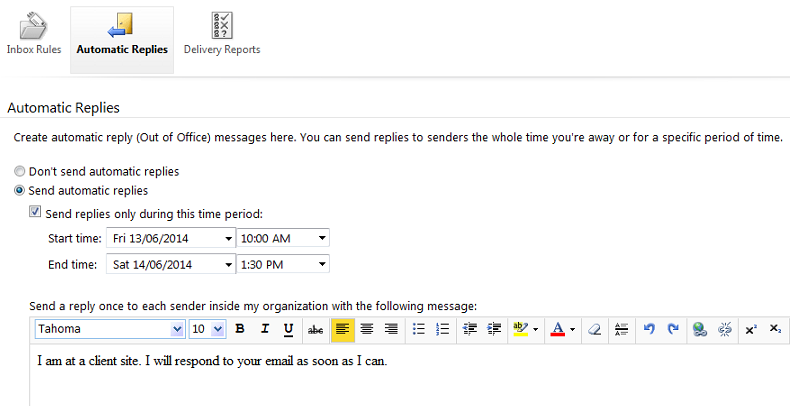
- If you would like to setup automatic reply messages, select the Send Automatic Replies checkbox.
- Select the Send replies only during this time period checkbox.
- Select a time period by using the Start time and End time dropdown lists.
- Enter a message that you would like to send to co-workers in the text field.
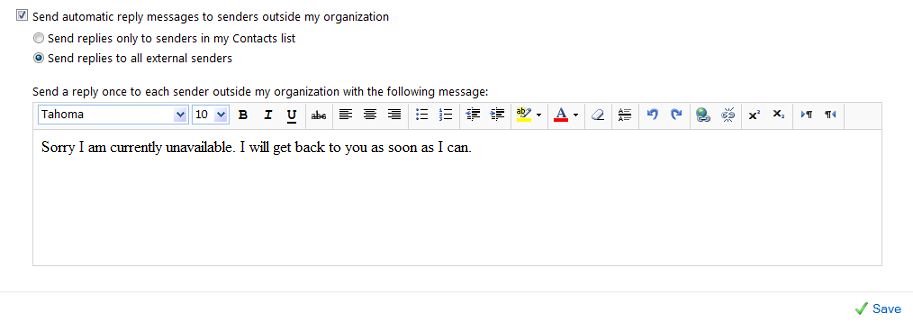
- If you would like to send an automatic reply messages to senders that are not part of your organization, select the Send automatic reply messages to senders outside my organization checkbox.
- If you would like to only send replies to your contacts, select the Send replies only to senders in my Contacts list.
- If you would like to send replies to all external senders, select the Send replies to all external senders checkbox.
- Enter a message that you would like to send to external senders in the text field.
- Click Save.


