Difference between revisions of "Uploading a vApp template"
Your guide to pathway services
| Line 35: | Line 35: | ||
<li>Install the plug-in.</li> | <li>Install the plug-in.</li> | ||
<li>Return to the '''vApp Templates '''tab.</li> | <li>Return to the '''vApp Templates '''tab.</li> | ||
| − | <li>upload icon (see image below).</li> | + | <li>Click the upload icon (see image below).</li> |
</ol> | </ol> | ||
| − | < | + | |
| + | |||
| + | [[File:Upload icon1.png|none|Upload icon1.png]] | ||
| + | |||
| + | |||
| + | |||
| + | When the '''Client Access Integration Control '''prompt appears you will only have <u>10 seconds to make a decision'''.'''</u> | ||
| + | |||
| + | <u</u> | ||
| + | <ol start="12"> | ||
| + | <li>Click '''Allow.'''</li> | ||
| + | </ol> | ||
| + | |||
| + | [[File:Client integration access control1.png|none]] | ||
Revision as of 13:59, 14 February 2014
A vApp consists of pre-configured virtual machines (VMs) that are used to combine applications with the operating systems that they are being run on.
vApps are used to stack multiple VMs so they can run as an application and provide support to cloud architectures.
To upload a vApp template:
- Log in as an administrator.
- Click on the Catalogs tab.
- Select My Organization's Catalogs (you should be brought here by default).
- Click the vApp Templates tab.
When you arrive at the Upload OVF package as a vApp Template:
You will need to Download the Client Integration Plug-in to enable OVF upload and download functionality.
- Click Download the Client Integration Plug-in.
- Click Save File.
- Locate and open the saved file.
- Install the plug-in.
- Return to the vApp Templates tab.
- Click the upload icon (see image below).
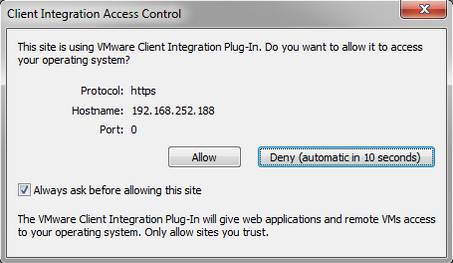
When the Client Access Integration Control prompt appears you will only have 10 seconds to make a decision.
<u</u>
- Click Allow.


