Difference between revisions of "Creating a forward rule in EasyMail"
Your guide to pathway services
| Line 46: | Line 46: | ||
'''OR''' | '''OR''' | ||
<ol start="2" style="list-style-type: lower-alpha;"> | <ol start="2" style="list-style-type: lower-alpha;"> | ||
| − | If you would like to save the forward rule and enable it, click Save.</ol> | + | <li>If you would like to save the forward rule and enable it, click '''Save'''.</li> |
| + | </ol> | ||
[[File:EasyMail forward rule3.png|none|EasyMail forward rule3.png]] | [[File:EasyMail forward rule3.png|none|EasyMail forward rule3.png]] | ||
Latest revision as of 10:39, 8 July 2015
Users can create a rule to automatically forward incoming mail to a number of other mail addresses.
To create a forwarding rule:
- Log in to EasyMail.
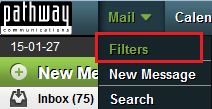
- From the Mail dropdown tab, click Filters.
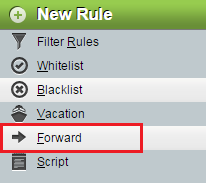
- Click Forward.
- Select the checkbox if you would still like incoming messages to be delivered to your inbox as well.
- In the Address(es) to forward to field, enter the email address(es) that you would like to forward messages to. Separate addresses using semi-colons.
Perform one of the following:
- If you would like to save the forward rule, but you do not want to enable it, click Save and Disable.
OR
- If you would like to save the forward rule and enable it, click Save.


