Difference between revisions of "Spell checking your EasyMail emails"
Your guide to pathway services
| Line 47: | Line 47: | ||
The correction will be displayed in green. | The correction will be displayed in green. | ||
| − | |||
| − | |||
<br/>[[File:EasyMail new message spell check4.png|none|EasyMail new message spell check4.png]] | <br/>[[File:EasyMail new message spell check4.png|none|EasyMail new message spell check4.png]] | ||
| Line 63: | Line 61: | ||
<ol start="12"> | <ol start="12"> | ||
| − | <li>Manually fix any errors that spell check was unable to correct.</li> | + | <li>Manually fix any errors that spell check was unable to correct, and then continue with your email.</li> |
</ol> | </ol> | ||
Latest revision as of 16:35, 15 June 2015
To compose a new email message:
- Log in to EasyMail.
- Click the Mail tab.
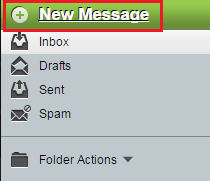
- Click New Message.
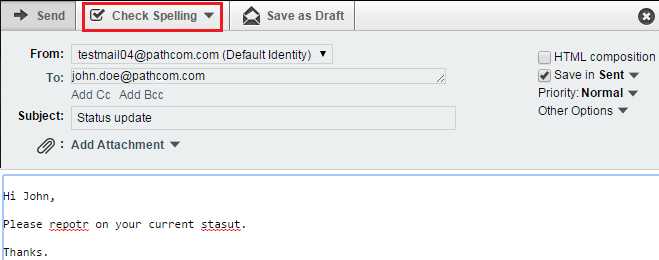
- In the To field, enter the email address of the person you would like to email. (use a semi colon to separate multiple email addresses).
- In the Subject field, enter a short message subject.
- (Optional) Click Add Attachment to upload an attachment from your computer.
- Enter your message in the text body.
- Click Check Spelling.
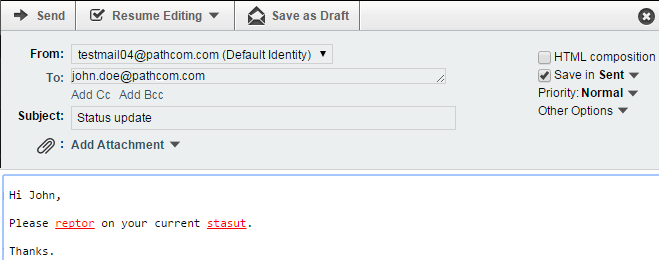
Misspelled words will be underlined and displayed in red.
- (Optional) Click on a misspelled word to view suggested corrections. (Based on the spelling EasyMail will try to guess what you were trying to spell).
- (Optional) Select a suggested correction.
The correction will be displayed in green.
- Click Resume Editing. (This will close spell check).
- Manually fix any errors that spell check was unable to correct, and then continue with your email.


